|
Troubleshooting
Print Quality
|
|
If you notice a problem with the quality of your prints, the probable solution is replacing one of the consumables. Keep in mind this basic guideline:
-
If the symptom appears in a single color:
Replace the toner cartridge.
-
If the symptom appears in all colors:
Replace the imaging unit, or fuser, or fuser roll, or main charge grid, or transfer kit.
To diagnose the problem, check these items:
-
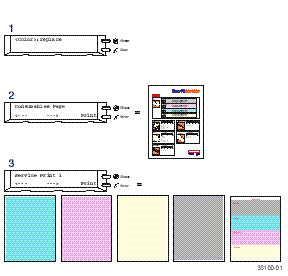
Check the front panel for a message on replacing a consumable.
-
From the
Help Pages
menu, print the Consumables Page; use it to diagnose and correct problems; it contains useful information, such as the remaining life for consumables.
-
From the front panel
Help Pages
menu, print Service Print 1. Examine prints for symptoms.
Symptom:
In one color only?
Solution:
Replace that color toner cartridge.
|
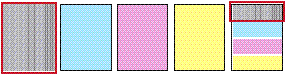
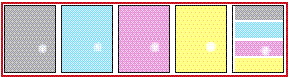
1 color has many vertical streaks.
|
|
Replace the toner cartridge.
|
|
1 color has a light vertical streak.
|
|
|
1 color is light or faded.
|
|
-
Adjust the color density (see
Controlling Color Density
).
-
Replace the toner cartridge.
|
Symptom:
In all four colors?
Solution:
1)
Choice of media or
2)
Replace imaging unit, or fuser, or fuser roll.
|
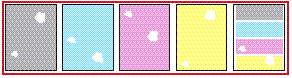
Streak through all 4 colors.
|
|
-
Use Xerox media.
-
Use the correct media tray for the media you are using.
-
When using the Multi-Purpose Tray, select the correct media in the front panel.
-
Print about 25 blank pages until the problem disappears.
-
Replace the imaging unit.
|
|
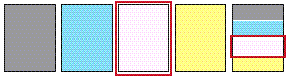
Spot in the same place on the page in all 4 colors.
|
|
|
Random spots appear on every page.
|
|
Symptom:
In all four colors?
Solution:
1)
Choice of media or
2)
Replace imaging unit, or fuser, or fuser roll or main charge grid.
|
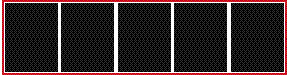
Prints are black (edge to edge).
|
|
-
Remove, then re-insert the Main Charge Grid.
-
Replace the Main Charge Grid.
Hints
-
Use Xerox media.
-
Use the correct media tray for the media you are using.
-
When using the Multi-Purpose Tray, select the correct media in the front panel.
-
Relative humidity may be too low (below 30% relative humidity).
|
|
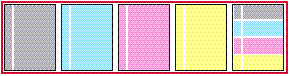
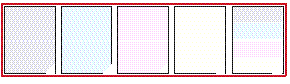
All 4 colors are extremely faded.
or
Each page has a chipped corner.
|
|
Symptom:
In all four colors?
Solution:
1)
Choice of media or
2)
Replace imaging unit, or fuser, or fuser roll or main charge grid.
|
Pieces of the printed image are missing and reappear out of place, approximately 129 mm (5 in.) down the page.
or
Media frequently wraps around the fuser (
Jam at C
).
|
Hints
-
Use Xerox media.
-
Print 10-20 blank pages of
plain
paper.
-
To avoid jams with Xerox transparencies, make sure that the logo strip is loaded
face-down
for the Multi-Purpose Tray and
face-up
for the transparency tray.
|
If
Jam at C, clear the media jam.
Print 10-20 blank pages to clean the roller.
-
If you still see the problem, replace the fuser roll.
-
If you still see the problem, replace the fuser.
|
Return to Topic List
|
| |
|